Saturday, January 4, 2014

2014 Seed Order

You didn't hear from me much last year because I was without a garden. However, by September we had all the raised beds constructed and filled in the back yard, so it will be full steam ahead in 2014! Look at all the growing space I have:


That's eight 3'x3' beds, and 16 8'x3' beds (set up in adjacent pairs).

I've been using some garden planning software to lay everything out and plan for succession planting. Even with so much space, I'm still tempted to overdo things. There are currently 75 cloves of garlic (Music) planted, and the following seeds have either been ordered or will soon be ordered. Time to start a seed starting calendar!

  • Arugula 
  • Asparagus: Jersey Knight Hybrid
  • Bush Beans: Royal Burgundy
  • Fava Beans: Windsor 
  • Beets: Cylindra, Golden, Chioggia 
  • Broccoli: Calabrese, De Cicco
  • Brussell Sprouts: Long Island Improved
  • Cabbage:Premium Late Flat Dutch
  • Carrots: Cosmic Purple. St. Valery
  • Cauliflower: Early Snowball
  • Celery: Tall Utah
  • Chard: Rhubarb Red
  • Corn: Blue Jade, Bear Paw Popcorn
  • Cucumbers: Parade, Crystal Apple
  • Eggplant: Black Beauty
  • Genovese Basil
  • Chives
  • Cilantro
  • Bouquet Dill
  • Garlic Chives
  • Florence Fennel
  • Mint
  • Greek Oregano
  • Giant from Italy Parsley
  • Green Culinary Sage
  • Thyme
  • Kale: Halbhoher Gruner Krauser, Red Russian
  • Lettuce: Forrellenschluss, Red Iceberg, Green Oakleaf, Tango
  • Leeks: Blue Solaise
  • Onions: Alisa Craig Exhibition, Yellow Sweet Spanish
  • Peas: Sugar Lace, Mammoth Melting Sugar Snow Pea
  • Sweet Peppers: Chervena Chushka, Bull Nose Bell, Chocolate Beauty, Miniature Yellow Bell
  • Hot Peppers: Chinese Ornamental, Joe’s Long Cayenne, Jalapeno Traveler Strain
  • Potatoes: Purple Viking, Yukon Gold
  • Radishes: Cherry Belle, French Breakfast
  • Rutabaga: Joan
  • Spinach: America, Strawberry Spinach
  • Summer Squash: Black Beauty Zucchini, Golden Zucchini 
  • Winter Squash: Pennsylvania Dutch Crookneck, Waltham Butternut, Table Queen
  • Strawberries: Honeoye
  • Determinate Tomatoes: Rutgers, Oregon Spring, Tip-Top, Principe Borghese, Roma, Martin’s Roma, Silvery Fir Tree
  • Indeterminate Tomatoes: Brandywine, Blondkopfchen, Dr. Wyche’s Yellow, Dester, Italian Heirloom, Riesentraube
  • Tomatillo

Saturday, July 6, 2013

Common CSA Dilemma: Too Much Kale

This is what happens when you get one week behind eating all the kale in your CSA:


Over the last two years, I've learned to like Kale. However, this week I've got lots of other great stuff to eat in our CSA share, including three different type of fresh greens that I won't be able to preserve. So, this kale is destined for the freezer. It took me less than hour to convert this into meal-sized servings in our freezer. I know a lot of people that find themselves with too much kale at once, so I figured I'd provide a step by step guide to deal with it.

First, de-stem and wash all your kale. I filled up an entire sink with cold water and it was able to handle this bunch. You'll be left with some tough stems that you probably don't want to eat; bonus points if you cut them into little pieces for compost.

In manageable batches, chop the kale into small - medium pieces, just as you would if you were cooking it for dinner. I put all of my chopped kale into a large stainless steel bowl (it filled it).

Next, prep your cooktop. You'll need a large pot of boiling water, a basket for blanching (or a slotted spoon if you plan to fish all the bits of kale out individually), and a container to safely transport the steaming hot kale back to the sink. Here's my setup (from left to right: large bowl of fresh, chopped kale, wire basket, boiling water, empty bowl).


Place some of the fresh kale in the wire basket (be sure not to add more than your pot can handle). Place the basket in the boiling water, mixing the kale around to make sure it's all covered with water. Blanch for two minutes. (If you don't have a basket, you can put the kale directly in the water, but you'll need to fish it out with a slotted spoon). The kale should be bright green.


After two minutes, remove the kale and let the water drip for a couple seconds. Place the basket in the empty bowl for transport to a waiting, empty sink. Immediately rinse with cold water to stop the cooking process. Get your hands in there and make sure you don't leave any warm spots.


Remove as much water from the kale as possible (I just used a spatula to press it against the basket). Measure the amount of kale you normally eat with a meal or in your favorite recipe, and place it in a freezer bag. Remove as much air as possible (you can use a FoodSaver, but I just used a straw and some quick moves with my fingers). Place in the freezer, and use throughout the fall and winter as you normally would use cooked kale (it will likely need a few more minutes of cooking when you use it).


I ended up with 7 cups of kale. My favorite way to cook it is sautéed with olive oil, onions and garlic, then placed over a hearty grain or toasted bread and topped with a soft boiled egg. Yum.

How do you use up your extra kale?

Saturday, June 1, 2013

Driveway Container Garden

We are still eagerly awaiting the arrival of the construction crew to backfill our yard and seed our lawn. Until then, construction of Gross Farms 2.0 is on hold.

However, I couldn't take another day without something edible growing outside our home. This morning we took a trip to the greenhouse and farmers market to get some things growing in pots. I was careful not to go overboard, but make sure we had all of the herbs we like to use fresh.

First, at the greenhouse we came across a beautiful clay planter planted with four different varieties of rosemary. For the cost of what we would normally pay for the empty planter, we have excellent starts of one of our favorite herbs that is very hard to grow here. Yes, I know rosemary grows like a weed in some climates, but it's mainly an annual for us so it's hard to get it growing to a size suitable for harvest until late in the season. From left to right, the varieties are Foxtail, Spice Island, Common Rosemary, and Gold Dust.


The next planter was rescued from the garden pile in our garage and filled with starts picked up at the farmers market. It includes chives in the middle, flanked by parsley and cilantro. There's a basil plant on each end, although the top of one broke off when I transplanted it. There are tiny leaves left below where the stem broke, so I'm cautiously optimistic that it will regenerate. 


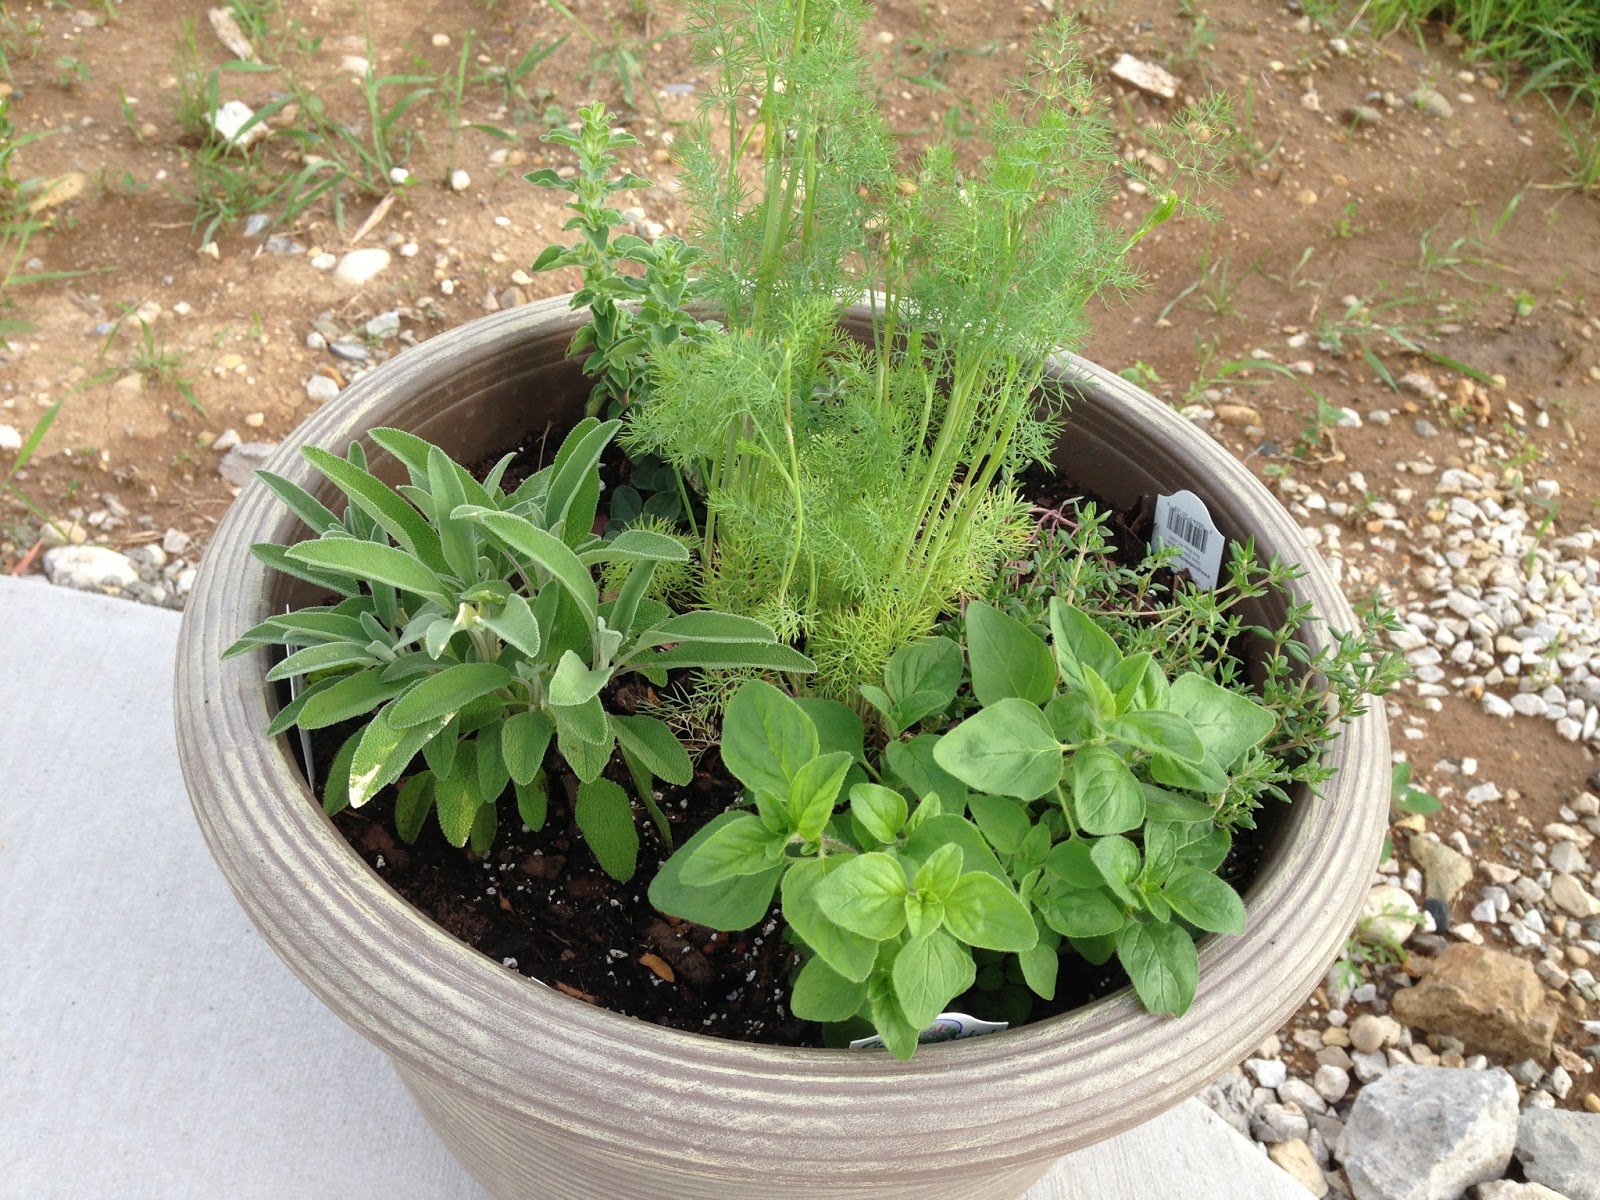
While at the greenhouse I came across some attractive, yet affordable plastic circular planters. In the largest I planted Fernleaf Dill surrounded by sage, Italian Oregano, Hot & Spice Oregano (a variety I've never heard of but had to try) and thyme. Hopefully this plant will be overflowing with herbs in a few weeks.


We purchased three of the smaller version of this pot, and each holds its own pepper plant. We got Jimmy Nardello for a sweet pepper, Kung Pao for a medium pepper, and Thai Chili for a hot pepper. I may edge these containers with flowers (nasturtiums?) as the peppers get a bit bigger. Rounding out the driveway gang is another pot of basil (aquaponicly grown basil we got at a dinner last night—I hope it adapts to the soil) and a small pot of spearmint. 


We only get late morning/afternoon sun in the driveway and afternoon sun on the porch. These containers really belong in the back yard but we can't do that until the dirt pile is knocked down. Hopefully they'll do alright in their current location for a few weeks.

Our CSA should be starting any week now, so my need for greens should be fulfilled. I can't wait to start building the new garden.

Saturday, May 18, 2013

No Garden This Year

I haven't updated the blog with the realization that hit me just before we moved into our new house: we won't have a garden this year. Why is that, you ask? Well, it's mid-May and our backyard looks like this:


Until that dirt pile moves and our yard is graded, there will be no garden construction. Unfortunately, we don't know when that will happen. It could be next week, or "sometime before July 4." You can't really tell in this picture, but the yard really is a good size. Right now, we're planning on using the back 35' of the lot for the garden, which will still leave us with a large yard. Of course, all plans are subject to change until the actual garden goes in, but this is what I'm currently thinking of using for a layout:


This plot is approximately 60' x 35' and features a living fence (hedgerow). I'm not exactly sure what I will plant yet, but I want it all to be edible. The key is to find plants that will all grow to roughly the same height (I would like 4-5 feet) and won't be damaged with a little pruning. Our backyard is open to all of our neighbors, so I want the hedgerow to be presentable.

Our new neighborhood has bylaws that restrict fence building. If I were to get approval to build a fence, it would have to match the character of the house, meaning it would be very expensive. I think a living fence is a good compromise - I can sink chicken wire on the inside to keep out critters, and all my neighbors will see is the hedge.

The beds in the plan are 3' x 16' and 3' x 3', giving me 456 square feet of growing space in the beds. My previous garden had six 4' x 16' beds (384 feet). I know I definitely want more space than I had in my last garden, and I'm a bit too short to reach the center of a 4' bed. I'm using the long and square beds because I want to try to plant each bed in the same family for crop rotation purposes...and a 3' x 16' bed of some plant families might be a bit much. It also gives me flexibility in terms of early/late season planting to make the most use of the space.

I anticipate that at least one of the 3' x 3' beds will be planted with strawberries and another with rhubarb, and one of the 3' x 16' beds might get planted full of asparagus. Perennial herbs may not be a concern, because I have plenty of other areas to landscape around the house and could work my favorites (chives, oregano, thyme) into the landscape.

I hope to have the garden in by fall so I can plant garlic, and maybe get a cold frame growing to overwinter some spinach and other greens. In the meantime, I've signed up for a CSA with Three Brothers Farm. They're just five miles from my house and in their second year of transition to organic. They've told me I can visit whenever I like, and they're planning some formal on-farm events. Hopefully this will satisfy my need to get my hands in the dirt.

So, this year the blog will probably be a combination of CSA photos and related recipes and an update on garden construction. I'm starting to feel the void where my gardening (and fresh produce) normally is this time of year, but hopefully our new garden will be even better. We learned a lot at out last house, and hopefully can avoid a few mistakes this time around.

Sunday, January 20, 2013

Gross Farms 2.0

I'm excited to announce that Gross Farms will be moving this spring. I started a new job in December that results in an hour+ commute. We put our house up for sale in late November and excitedly accepted an offer on Monday. On Thursday we looked at houses, and fell in love with the second. It's a new build, and I can confidently say it's our dream home. It includes an extremely large backyard (105' x 90'), so I will also be able to construct the garden of my dreams.

The new owners of our home will have 100+ heads of garlic to harvest this summer, and we'll have to say goodbye to the first garden we ever built. Many of our friends are surprised that we're not more attached to it, but we feel it was a learning experience and we'll approach our new garden differently.

Right now, moving day is February 28. We hope that we'll be able to start construction in March or early April and start planting in May. We'll sacrifice some early-season harvests, but it will be worth it in the end.

Stay tuned to follow my garden planning process :)

Sunday, October 28, 2012

Compost, Garlic & Hoops

I spent a solid 3.5 hours working in the garden, assisted most of the time by my wonderful husband. The first order of business was to improve the compost pile. We're pretty lazy composters, and recently the neighbor complained that our compost smelled. The cause was pretty clear - we had way too many "greens" in the compost (kitchen scraps, spent grain from brewing, etc.) and not enough "browns" (leaves, grass clippings, other dead plant matter).

I gathered two garden cart-fulls of leaves from the front yard, dragged them to the back yard compost bin, and mixed it into our current compost. Later I added another cart-full of leaves just for good measure.

In the meantime, Aaron prepared the garlic bed. I try to avoid tilling whenever possible so we can have some nice, fluffy soil full of worms...which means prepping a bed is hard work. I did help, a little. We sifted 12 buckets of finished compost to add to the bed, which I then raked in and smoothed the soil. Time for the garlic! Last year I planted 3 rows in my 4' x 16' beds. I realized I could have planted them closer together, and I finalized that decision after seeing that Daphne planted her garlic in a 6" grid. Fun fact: The holes in the leftover trellis material sitting in our garage are exactly 3" apart—perfect spacers!

Last year I planted about 95 cloves of garlic (and I think I paid about $40 for the seed), and I'm quite sure I won't have enough to get us through until next year's harvest. So, I planted 119 cloves this year (trying to strike a balance between planting more but leaving some for our use). I chose the largest cloves from last year's harvest. The Music cloves are amazing - I planted 63 of those. The Spanish Roja are much less impressive, but since I had them, I planted 56 cloves. Because I planted in a grid instead of in rows, I managed to use about half as much space, even though I planted about 20% more than last year.

The difference in the soil quality between last year and this year is remarkable. Last year I had to dig holes and shove the garlic cloves into the cold earth in between clods of clay soil. This year, I could push the cloves a few inches into the soil and cover them without tools in most cases. The compost has been doing its job :)

To finish, I brought another cart-full of leaves from the front yard, crunched them up a bit, and used them to mulch the garlic. Aaron watered it in, and now we'll just sit back and wait for spring.


Also, Aaron bought some 7mil plastic to put over our bed of chard, carrots and beets. This is our first year using hoops, so it's really just an experiment - but I'll be very excited if I can harvest chard throughout the winter, and carrots and beets in early spring.


Sunday, September 30, 2012

Buying Beef in Bulk

I have a great garden in my back yard, but I do not have the space (nor the blessing of my husband or knowledge needed) to raise my own meat. For the last two years we've been buying our meat at the farmer's market, from local farmers that raise their beef, pigs, chicken, buffalo, etc. on pasture. After thinking about, we decided we'd like to 1) avoid going to the farmer's market so often in the winter, 2) try to eat more cuts of an animal, and 3) save money while still buying from local farmers.

So, we decided that we would buy beef in bulk. We solidified our decision when we found a 16-cubic feet upright freezer on super-sale at the local home improvement store. So, this summer we visited R Farm to check out their farm store. Based on our online searches, they were offering the best value in local beef raised on pasture (although they're not certified organic). We planned to go to the store to buy a few cuts, try them out, and then decide if we would buy. However, while there we heard Mac talking about the cost of feed going up this winter because of the drought, which would ultimately increase the price of beef. We decided right then and there to put a deposit down on a half steer, without ever tasting the meat. We still bought some cuts and took them home with us, and I'm happy to report that they were delicious.

Our farm visit was in mid July, I think. I received a call from Nicole on September 13 letting us know that our steer was ready for slaughter in five days. It was a little faster than I expected, but fine by me. I started reading up about cuts and requested our selected cuts from the butcher R Farm works with, Detjens Northern Trails Meats. They had an online form, which made it super easy.

Yesterday we went to go pick up the meat. It was a lot, but manageable. We filled three coolers. We realized we were newbies because we were the only people not wearing gloves. When packing coolers full of meat, it helps to have gloves on - my hands got a little frosty. Lesson learned from last time.

We got the meat home and packed it in the freezer. I'd say it fills about 60% of our freezer. Our freezer has three shelves, a bottom basket, and door space. The beef filled the bottom rack, bottom shelf, and about 80% of the second shelf.

Here's what we ended up with:

  • 3 chuck arm roasts (about 3 lbs each)
  • 3 blade chuck roasts (about 3 lbs each)
  • 1 rib roast (maybe 5 lbs?)
  • 2 rump roasts (about 3 lbs each)
  • 1 english roast (about 4 lbs)
  • 6 packages of stew meat (about 1 lb each)
  • 4 soup bones
  • 2 large packages of short ribs (about 3 lbs each)
  • 8 round steaks (about 12 oz each)
  • 6 sirloin steaks (about 10 oz each)
  • 8 t-bone steaks (about 8 oz each)
  • 4 porterhouse steaks (about 10 oz each)
  • 8 ribeye steaks (about 10 oz each)
  • 5 lbs of hot sticks
  • 73.5 lbs ground beef
*I didn't weigh any of this meat - I'm totally guessing, and likely a bit conservative. The only thing I'm sure of is the ground beef.

Since most of my beef cooking experience has been tacos, chili, hamburgers, and stew, I'm going through my cookbooks for great ways to use all this beef. We're looking forward to quality meat without all the running to the farmer's market.

As luck would have it, we signed up for a whole-hog butchering class 6 months ago, and that fell on the same weekend our beef was ready. So today we butchered a hog and brought home a cooler full of pork. More on that in a separate post, once I wade through the pictures.