Sunday, October 11, 2020

Buying A Quarter Steer (Beef)

For just the second time in a decade, we've purchased bulk beef from a local farm. I'll be honest, with the ongoing pandemic I'm glad we have freezers full of meat (and garden-preserved veggies) to help us avoid trips to the grocery store while we continue to spend most of our time at home over the winter.

This post is to help demystify the bulk meat purchasing process (see also my post about buying a whole hog).

We purchased our beef from the same farm that raised our pork and chickens. I contacted them in May and placed a deposit on a quarter of one of their Black Angus steers. They told me the next beef would be available in October. This farm offers mixed quarters, rather than designated front and rear quarters. This means that we're basically sharing half of the steer with someone else, allowing each of us to have some of the cuts from both the front and rear quarter (so we can get both brisket and sirloin). 

On September 19 the farm called with news the steer would be butchered on September 24, and I provided my cutting instructions over the phone (approximate size of the roasts, thickness of steaks, number of steaks per package, size of ground beef packages, what goes into ground and stew meat, if we want any non-grocery cuts, etc.).  Beef is best if it hangs (ages in a cooler) before being cut into smaller pieces, so we didn't receive our cuts until October 10.

And yesterday, we received 3 large cardboard boxes full of packaged meat, delivered right to our door (I love that about this farm). Buying meat this way makes me feel good about supporting our local economy. The steer grazed and lived a life on pasture 20 minutes from our house, and it was slaughtered and butchered by a full-service butcher 15 minutes from our house.

What We Got From Our Quarter Beef

The farmer delivered the boxes right into our garage, where we had a folding table, scale, Sharpie, and inventory sheet set up in front of our auxiliary freezer (a 3/4 size upright freezer). I like to weigh and inventory each cut of meat for record keeping. Not only does it allow me to write posts like this, but I can also keep track of what's in our freezer without digging around in it constantly. 

The first box I opened was all ground beef. That's a lot of taco nights.

44 tubes of ground beef in a box

Here's the full inventory.

Trim Cuts

  • 44 pounds of ground beef
  • 7 packages of stew meat, 9 pounds total
  • 1 package spare ribs, 1.5 pounds

Steak

  • 7 rib-eye steaks, 10.5-14.5 ounces each
  • 7 t-bone steaks, 18-25 ounces each
  • 4 bone-in sirloin steaks, 24-38 ounces each (!)
  • 3 top round steaks, 19-27 ounces each
  • 1, 1-pound flank steak

Roasts

  • 2 arm roasts, 3-3.5 pounds each
  • 2 briskets, 2.5 pounds each
  • 6 chuck roasts, 2.5-4 pounds each
  • 1, 3-pound rump roast
  • 1, 4-pound sirloin tip roast
In total, that's 118.5 pounds of beef. You could easily alter the composition of this order by having the steaks cut thinner (we cut ours thick), or putting more of the roast meat into either the ground beef or the stew meat.

Extras

As always, I also requested some of the "extras." The farmer was surprised that she received more requests for organ meat than normal, so I asked for some things that I wasn't able to get because we were sharing this steer.
  • Kidney (10 oz)
  • Liver (3.5 lbs)
  • Neck Bones (3 lbs)
  • Soup Bones (4.75 lbs)
  • Suet (5.5 lbs)
The liver is for the cats. The kidney may be too, unless I get adventurous. T bones are for stock, and I hope to use the suet either in a traditional British recipe when I'm feeling adventurous, or render it into tallow that I can use for frying.

Once unpacked, this fit easily in our auxiliary freezer. The bottom drawer is filled with ground beef, and most of the cuts are on the bottom shelf (there's a plastic container with more cuts on the shelf above it, but it will fit on the bottom shelf if I force it) as well as the lower two shelves in the door.

freezer filled with beef

Looking back on our first bulk beef order in 2012, I'm struck by the difference in breeds of steers. Back then, we shopped around for "the best value." That means what we ended up purchasing was a Jersey steer raised mostly on pasture. These aren't steers that are bred for meat; they're the male offspring of a dairy cow (which obviously can't be raised for milking). So not only was it cheaper, but it was smaller. Our half steer back then provided just under 150 lbs of meat, and the t-bone steaks were 1/3 to 1/4 the size of what we received this year. Our recent purchase was a Black Angus steer, which is bred for beef.

Quarter Beef Cost Comparison

Some people purchase beef and other meat in bulk to save money. Although there is some cost savings, that's not our main motivation. We want to support a local food system based on natural practices, and enjoy the security and convenience of a fully-stocked freezer. Yet, the cost comparison is helpful for folks trying to decide if they want to make their own purchase, so I'm including it.

What We Paid

Our quarter beef was priced at $4.60 per pound hanging weight, and our quarter hung at 213.75 pounds. We also paid $173.38 to the butcher in processing fees. So, our total cost for the quarter beef was $1,156.63. Divide that by the 118.5 pound of grocery store cuts, and we paid $9.76 per pound.

What It's Worth

The meat we purchase is raised on pasture, so the best comparison I can find is the USDA Monthly Grass Fed Beef Report. After consulting the September report, we barely came out ahead when comparing our grocery store cuts. We paid about $192 less than we would have for all the same cuts at retail, thanks in large part to the steaks we received. I should note, however, that the listed range for a quarter of grass fed beef is $5.75 - $11.75 per pound, so our farm is charging well below average. 

Why We'll Keep Purchasing Bulk

Interestingly, we would probably only buy steaks 2-3 times per year if we didn't buy beef in bulk, so we probably spend more money on meat when we purchase it this way than if we were to buy directly from the store. However, grass fed beef isn't always available in our local grocery store (especially cuts beyond ground beef) and it is often trucked in from around the country, processed at the same large meatpacking plants as conventional beef. I'm much happier buying my meat directly from a farmer, and it diversifies my eating habits in the process.

If you live in the Madison, WI area, check out Anisoptera Acres. They're an off-grid family farm that raises pork, beef, and chicken on pasture. In addition to bulk purchases like the ones we made, they also offer single cuts of meat and homemade honey with free home delivery on orders over $40.

Sunday, October 4, 2020

2020's First Frost

This was a week of last harvests in the garden.

On Tuesday I picked one more basket of ripe tomatoes.

basket of tomatoes

Most were roasted, blended, and then slow cooked into about 3 cups of tomato paste. The large yellow tomato in the upper left of the photo was saved for our last tomato sandwich of the year, which we eat today. It was a BAT - bacon, arugula, tomato.

Thursday (October 1) was a forced harvest, as we were expecting our first frost. I picked one more basket of tomatoes at varying stages of ripeness, including many green tomatoes. The biggest harvest was peppers; I had loads of sweet peppers on plants at a variety of stage of maturity, but most were still green. I also picked plenty of jalapenos, a few ripe Fatali and Scotch Bonnets, and plenty of immature hot peppers. The pepper harvest filled the bottom of a large plastic tote.

large container filled with mostly green peppers

There are about 3 gallon bags of whole peppers in the fridge, and the rest have been chopped and are freezing on trays. I expect there are at least 2 gallons of chopped frozen peppers. Chili base for the winter shouldn't be a problem. I need to figure out what I'm going to do with the hot peppers. I think I'll make one jar of candied jalapenos. We've never had them and I'm wondering if they'd be a good canning project next year. I'd also like to make another hot sauce, but may need to chop and freeze some for winter soups and stews.

I thought I had four ripe banana melons to bring in, but three of them had suffered significant damage from insects or other critters. That left me with one—just the second banana melon I've gotten all year. This one was much more ripe and flavorful than the first; my husband and I ate the entire thing before dinner. I definitely want to grow melons again next year, but I'm not sure what variety.


I also brought a large bunch of celery in before the frost, just in case the other plants didn't make it, and I snipped the last stems of basil. A walk through the garden this morning confirmed that cold-hardy veggies like celery, Swiss chard, carrots, and rutabaga are looking great, while the frost claimed everything else. Sunday night is bringing another frost. In fact, as I write this it's already 31.5 degrees in the garden.

Dave at Happy Acres hosts Harvest Monday for gardeners around the world to share their bounty.

Sunday, September 27, 2020

September Notes

A post with no pictures. Imagine that.

September has been a heavy month in my mind. Wisconsin's COVID-19 cases keep rising (daily case are nearly 10x what they were when we had the stay at home order), the politics surrounding the presidential election are ugly, I see systemic racism around every corner, yet I still have a job to do, a household to contribute to, and a garden to care for. I haven't felt like taking the time to blog about harvests, though. Here's a summary of the month's happenings, for posterity.

As September nears its ends, my tomatoes are still producing (mostly Juliets, although there are a few straggler Celebrities), peppers are doing wonderful, and I finally got my first ripe banana melon. I'll consider growing the banana melon again; it's the perfect size to use a melon baller, making the serving easy. Mine tasted like a mild, floral cantaloupe. I suspect the flavor would be more concentrated if I watered it more regularly. I've harvested carrots and the first rutabaga for roasting—the carrots are gorgeous, and I'll wait for the first frost or two to kiss the rest of the rutabaga. Some celery was harvested for pork stock I made.

I roasted the first few red kuri squash, which have been curing for about a month. I didn't realize the skin of this winter squash would be both edible and delicious. It's a nice, easy roaster. Also harvested my one and only butternut squash, which has now been curing for a week. Usually I have them in abundance; either my seed was too old or the area I planted it in was too shady.

Cooking and preserving has been in high gear. I canned 7 quarts of beets from the garden, continued to make and freeze or eat tomato sauce (some of which joined some Swiss Chard in a delicious vegan lasagna I made for a dinner with friends), froze nearly a gallon bag of chopped sweet peppers, and cooked my dried beans for the first time in a soup along with Swiss Chard ribs, carrots, and blended roasted veg (red kuri, carrots, rutabaga).

Then came the apples. I get 5 pounds of apples per week in the fall in a CSA share from a local farm. I dehydrated a half gallon jar of apple slices, and then decided to go big and order some #2 apples - 100 pounds of them. Mom came for another visit and we canned 26 quarts of applesauce, 10-ish 4oz jars of apple syrup (failed jelly), and 8.5 pints of apple butter. Just today I made the last remaining apples into applesauce that I stored in the fridge; probably about another 3 quarts.

The cover crop I planted is looking fantastic. Since a frost still isn't in the 10-day forecast, I think we'll end up having to mow it at least once this fall. As it germinated, it was clear I seeded some areas better than others, so I ordered some more seed and resowed some areas of the new garden yesterday. By mid October I should have most of the existing garden cleaned up and planted with cover crop for fall as well.

My seed garlic arrived about two weeks ago. I ordered from The Garlic Underground, which is just 35 miles from my house. I'm hoping that means their garlic will be well-suited for my garden's micro-climate. Planting will commence a week or two after our first frost.

I've also done a bit of garden-related reading. I ordered a stack of 10 books during Chelsea Green Publishing's Labor Day sale, and so far I've made it through Growing Great Garlic and Going Over Home: A Search for Rural Justice in an Unsettled Land. While written nearly 30 years apart, both had good lessons for me.

Lastly, we purchased a weather station for the garden! I'm hoping it will better help me understand my microclimate, and will also provide some electronic record keeping of our temperature and rainfall. You can take a peek at my local weather conditions.

That's the highlights of the garden for the last three weeks. 

Monday, September 7, 2020

Labor Day Canning Extravaganza

I enjoyed a 4-day weekend for Labor Day this year, and spent most of it either in the kitchen or the garden. Since putting up food is just as important as growing it (if you want to enjoy it all year), I'm documenting some of my preservation here. And because I'm damn proud of what we got done on a "leisurely weekend." (We = my mom and I. She was my kitchen and garden helper Friday - Sunday.)

Tomatoes. Oh, the tomatoes. We had 36 pounds of tomatoes to process, and took care of the first 20 on Friday afternoon. We washed, peeled, quartered, removed seeds and gel sacs (saving them in a bowl to address later), and heated them according to the Ball crushed tomatoes recipe. We filled almost five quart jars (the fifth was less full than I would have liked, but I topped it up with juice). The remaining two quarts (7 fill my canner) were filled with tomato juice left in the pot, and also strained from the discarded gel sacs. To get that juice, I ran the discarded liquid through a food mill, and then poured through a fine mesh sieve. Into the boiling water canner it went, and then we had a mess to clean up and I had dinner to prep (we had country style ribs with roasted potatoes and steamed green beans).

The weather was gorgeous on Saturday, so we spent it in the garden prepping the expansion area for cover crops, which I seeded after dinner. Aaron was a big help in this endeavor.

But on Sunday, it was back to the kitchen, and tomatoes. The remaining 16 pounds went into a double batch of roasted tomato soup. This recipe doesn't rely on the boiling water peeling method. Rather, you wash, half, deseed (again, saving that goop for juice), and then roast the tomatoes. After roasting they should just slip from their skins. But not so easily if you've accidentally overcooked them, or used very small tomatoes, or maybe ever. This was a tedious job, and I was thankful for my immersion blender so I didn't have to spend even more time transferring soup from pot to blender to bowl and back to the pot. As anticipated, this recipe filled 6 quart jars so I processed one more quart of tomato juice along with it. While the soup was in the pressure canner, I sliced jalapeños and made pickled hot peppers for the first time, since Aaron eats them on pizza. I processed 7 half pints in the hot water bath canner while the pressure canner was depressurizing. Everything was done at about the same time.

Monday could have been a day of rest, but I had more hot peppers I wanted to process. I made an orange hot pepper jelly, substituting yellow fatali hot peppers and some red and yellow yum yum sweet peppers for the jalapeños in the Ball recipe. This turned out very spicy, but should still be good on some goat cheese with bread or crackers. I canned 12 four ounce jars and had about 10 ounces left to store in the fridge.

Grand total: 33 jars of preserved food this weekend. Not bad.

Harvest Monday: September 7

I passed peak tomato without even noticing it.

After picking another 30 pounds on Thursday evening, I realized there wasn't an overwhelming amount of fruit hanging on the vines. Sunday morning, I harvested just a handful. We'll have tomatoes here and there for another 1-3 weeks but I believe the days of 30-pound harvests are long gone.

Looking back, the first tomatoes ripened around July 26, came in at a steady but manageable pace for the next 3 weeks, and then kicked into high gear for 30+ pound weeks for the next 2-3 weeks, and now we're back to the steady trickle. It's interesting to look back at the calendar because it feels like I've been harvesting and processing tomatoes forever.

Here's the photo evidence from Thursday. In addition to the tomatoes, I got some nice peppers.

cardboard flat of tomatoes with some green, chocolate, and yellow peppers

cardboard flat filled with tomatoes

My mom and I processed 20 pounds of the ripest tomatoes on Friday, resulting in 5 quarts of crushed tomatoes and 3 quarts of tomato juice.

Saturday was a work day, prepping the garden expansion area for cover crop seeds, which I managed to sow just before sunset, followed by my husband raking them in with the lawn tractor. It was just in time, as the rains came overnight. This is the first year I'm planting a cover crop. I hope it goes well. I went with an all-purpose garden cover crop mix from True Leaf Market. 

While cleaning out a portion of the garden, I pulled my first few carrots (gorgeous, but long; I probably let them go too long) and the rest of the Jacob's Cattle bean plants. No photos though.

Sunday was dreary; perfect for more canning. First, I went to the garden during a break in the rain to pick the majority of my basil. I also ended up with a handful of tomatoes and some more gorgeous peppers.

tomatoes and peppers in front of a pint glass full of basil

Mom and I tackled the Ball roasted tomato soup recipe for the first time, doubling it. We ended up filling almost every square inch in my oven with trays of roasted tomatoes.

four sheet pans of halved, seeded tomatoes

16 pounds of tomatoes and hours of work yielded the expected 6 quarts of roasted tomato soup + 1 quart of tomato juice. This better be darn good soup! While the tomatoes were processing, I put together a batch of pickled jalapeños that could be water bath canned. My husband eats pickled jalapeños on his pizzas frequently, and we've always purchased them at the grocery store. I hope he likes the home canned ones, because jalapeños are easy to grow and quick to pickle. When I put them in the canner, I had both burners running a canner, which I think was a first for me.

a pressure canner and water bath canner on the stove

Sunday dinner was wood-fired pizza from a local farm, but I made a salad of tomato, basil, mozzarella, olive oil, and a balsamic reduction.

large slices of yellow tomato topped with slices of basil and a single basil leaf, dotted with balsamic vinegar

This post is part of Harvest Monday; visit Happy Acres to see what other gardeners are harvesting this week.

Monday, August 31, 2020

Harvest Monday: August 31

I made a new friend in the garden this week. Although she startled me when I first met her, now I like to look for her when I'm out there. I've learned she's a common Yellow Garden Spider, but this is the first time I've seen one. She's woven her web right among the Juliet tomato plants.

yellow and black spider in its web

This week's harvests were still very tomato-centric; I brought in over 30 pounds, and so far I've canned 9 pints of salsa, 6 quarts of crushed tomatoes, and 7 half pints of tomato juice. I did another dehydrator full of Juliet tomatoes, adding another quart+ to the pantry, and I still have two large bowls of slightly underripe tomatoes on the counter. It seems like it will never end, but I'm not complaining. Our weather appears to be turning this week, with lows dipping down into the 50s and highs in the 70s most days. I think we'll have one or two more 80 degree days this year, but we're definitely on the path to fall. As long as this weather holds for the next 30 days or so, I'll be happy. Fall is my favorite season.

Although the seasons are starting to change, Juliet shows no signs of stopping. look at these lovely tomato clusters!

cluster of small tomatoes at varying stages of ripeness.

The Romas are just about done, and the Celebrities are chugging along but slowing down. My indeterminate tomatoes are still setting blossoms; they seem more optimistic about the season than I do.

I harvested some bell peppers and hot peppers, although something seems to be causing rot in the red bells, which is disappointing because they finally got enough color to pick this week. I picked my first Chocolate bell pepper though, and those plants appear healthy. This was one of a number of first harvests.

I hardly use celery in the summer—in my kitchen it shows up most in soups and stews, fall - spring. So when I grow it, it's almost entirely for the freezer. I took my first cutting this week; I should have picked it earlier to encourage more growth, but I'll still get plenty this year. This was a nice bouquet for an afternoon before it was chopped and frozen.

celery stalks in a mason jar

Another first harvest was a Minnesota Midget melon - a short season variety of cantaloupe that grows to be about softball size. This is my first year growing melons in the home garden, and I've been anxious to see if they will ripen (they were planted a bit late, direct-seeded, with very old seed). I'd read about "the slip" with melons—you know they're ripe when the fruit slips right off the vine without any resistance. I picked up a melon that had changed color to inspect it, and I gasped when it slipped! I think I should have let it go for a few more days, as it still had plenty of yellow on it and it was a bit bland tasting. I have one more of these that should ripen (along with lots of Banana Melons), so I'll try to let that one go longer.

small yellowish melon held in the palm of a hand


two halves of a melon

Some of my Jacob's Cattle bean pods were dry, so I harvested and shelled those. I'm surprised I got any at all, as this entire row was eaten almost down to the dirt by something right after I planted it, but it was resilient. I'll be lucky if I fill this jar this year with the entire row, but I look forward to eating my first home-cooked dried beans.

Approximately half a cup of dried purple beans in a glass jar

My last "harvest" was something I was threatening my husband with all week and had all but decided not to do. We have purslane everywhere in the garden, growing as a weed. Particularly in the area we've cleared to expand the garden for next year (I still need to write about those plans), we have a bumper "crop." The more I read about it, though, the more I wanted to try it. So I grabbed some and brought it in to add to a green smoothie, after snacking on it in the garden to see what it tasted like. I blended it with a tart apple, cucumber, almond milk, and a little light honey syrup left from canning peaches. It made a great smoothie! There's a chance it won't all end up in the compost pile next year.

Here's a photo of some purslane, held up over a field of purslane.


The field of purslane is no more, though. I made it out there with just enough time before sunset on Sunday and tilled the entire space. The plan is to have the layout for the new garden planned over the next week so I can cover some areas with cardboard mulch, mark out the space for the garlic beds, and seed the rest with a cover crop to enrich the soil before next spring's planting.

As for last harvests, I picked two 8-ball zucchinis that may end up on the compost pile (although still small, they were turning from green to yellow like a fall squash would) and then pulled the squash beetle ravaged plants. In a big of spitefulness, I tossed one of the squash beetles into the spider's web.

The rest of my weekend was filled with non-garden food projects, including rendering lard for the first time (somewhat successful) and taking delivery of bulk meat from a local farmer. I wrote about our process of buying a whole hog, if you're interested.

Harvest Monday is a time for gardeners around the world to share their harvest and other garden activities. It's hosted by Dave at Happy Acres; head on over to the Harvest Monday hub at the bottom of his posts to see what he and other gardeners are doing.

Saturday, August 29, 2020

Buying A Whole Hog

We've been buying bulk pork since 2014, when we started with half a hog from a local farmer we knew personally. Today we took delivery of our third whole hog, and I thought it might be nice to write up some details for folks considering making their first purchase. If you decide to opt out of the factory-farmed meat economy, you may be intimidated by the process of purchasing your meat directly from a farmer. This post will help you understand the ordering process from start to finish. Later this year I'll add a post for beef.

Why We Buy Whole Hogs

  • We want to support local farmers who raise their animals humanely, and as naturally as possible. We want to know that our pig had a good life. We have, on occasion, visited our pig to "meet our meat" while it's still on pasture.
  • The meat tastes better. At least to us, pasture-raised pork chops, bacon, and roasts have a much richer flavor than anything you'll buy in a grocery store. If you're able to find a heritage breed, like Red Wattle, you're in for an extra treat.
  • We control the cuts of meat. We like our pork chops thicker than most, and sometimes we want the pork belly whole so we can make our own bacon. We want the butts whole for the smoker. Yes, you can always order these from the butcher, but we enjoy the control we have over the finished product.
  • I like the challenge of cooking all parts of the pig. As you'll see later in this post, there's hardly any part of the pig I don't take. While some people may think of pork as just chops or bacon, I like to have the bones for stock, hocks for soup, and even fat for rendering lard.
  • We like having a stocked freezer. Between my gardening, canning, bulk purchases, an occasional trip to Costco for dried goods, I can make many meals without going to the grocery store. I love a Sunday night of meal planning that doesn't require a grocery list.
One reason I didn't list was saving money. Although we do save money on a per-pound basis compared to the retail price of pasture-raised pork, "going whole hog" isn't a net money-saver for us. If we didn't have all this meat in the freezer, we would eat less of it overall, reducing the meat bill. There's a full breakdown of our savings compared to the retail price at the end of this post.

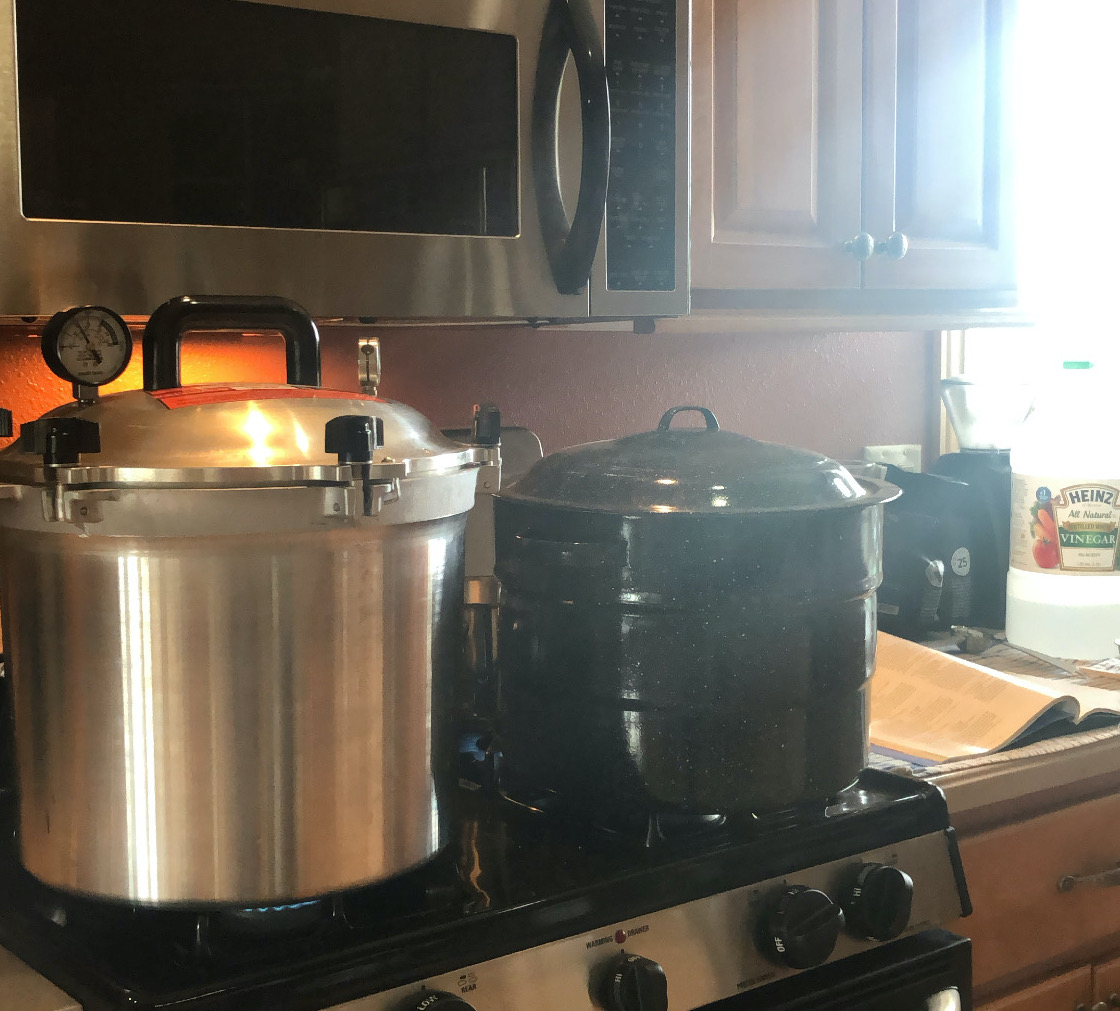
I should note, we have more than sufficient freezer space for bulk meat. In addition to the standard size refrigerator/freezer in our kitchen, we have a chest freezer in the basement and an upright freezer (about the size of a standard refrigerator) in our garage. The chest freezer was purchased used on Craigslist, and the upright freezer came from a scratch and dent sale at the appliance store. So yes, we have more freezers than people in our house. Don't judge. A whole hog will probably fill half to 3/4 of a chest freezer.

Ordering A Whole Hog

Ordering bulk pork generally requires planning. We've usually ordered our hogs anywhere from 3-8 months in advance. Prior to this year, our last bulk pork purchase was in 2017. The young farmers we purchased from in 2016 and 2017 decided not to continue producing pork, so we needed to find a new farm. I used the Wisconsin Farm Fresh Atlas to find farms in my area producing pork, and was pleased to find a farm less than 15 miles from our house. I contacted them in early May and was able to reserve a whole hog scheduled for butchering in August. I was required to put down a $200 deposit, and was then instructed to just wait for a phone call in August to provide cutting instructions.

To find a provider near you, either use a similar farm guide, google (although many farms have very basic websites, if they have a website at all), or contact a local butcher. They can either sell you a whole or half hog directly, or connect you with a farmer who uses them as a processor.

Cost of a Whole Hog

All you'll know when you order is what the price per pound will be for your hog. This year, ours was $4.05/lb. Nationally, this can range anywhere from $3.50/lb - $9.50/lb. If you only order a half hog, the price may be slightly more. To estimate the eventual cost of your purchase, you need to identify the following things.
  • Price per pound 
  • Estimated hanging weight (this varies by breed; your farmer should be able to provide an estimate)
  • Butcher and processing fees
Your total will be the price per pound multiplied by the hanging weight, plus the butchering and processing fees.

The hanging weight is how much the carcass weighs after it's been butchered and some non-edible parts (hide, feet, head, some internal organs, some bones) have been removed. The hanging weight is usually about 72 percent of the total live weight of the animal. We've had hogs hang as low as 95 pounds (a heritage breed that was either a runt or was harvested too early) and as high as 175 pounds. I've seen reports of some homestead hogs hanging over 200 pounds. The actual weight of the cuts of meat you'll get will be less than the hanging weight since it includes fat, some bones, and other parts you may not want (I take them all).

Butcher and processing fees are somewhat variable, but usually there is a kill/butchering fee, a processing fee (to cover the labor for breaking down the carcass) and specialty processing fees such as smoking/curing or sausage making. Our total butcher and processing fees are usually between $100 and $200 for a whole hog, depending on what cuts/products we order.

You won't know your final price until after the hog has been butchered and processed. The farmer will call or email you with the hanging weight and the total amount due. They may or may not have the butchering and processing fees available depending on how they're handling pickup (see below).

The hog we ordered this year is our largest (and most expensive) yet. It's also the first time we haven't ordered a Red Wattle; we decided to opt for our closest farmer who practiced natural techniques rather than seek out a Red Wattle farmer. Here's how the price of our hog was calculated.
  • Price per pound: $4.05
  • Hanging Weight: 174 pounds
  • Butchering Fee: $50
  • Processing (60 cents per pound): $104.40
  • Ham Smoking (85 cents per pound): $31.37
  • Bacon Smoking (95 cents per pound): $13.49
So, the cost of the meat was $704.70, and the processing was $199.26, for a grand total of $903.96. What did we get for that? I'll share after explaining what it means to submit "cutting instructions" and how to actually get your meat products.

Submitting Cutting Instructions

Cutting instructions are exactly what they sound like—instructing the butcher on how you'd like your meat cut up. There are plenty of options when butchering a whole hog, and when you choose one thing (e.g., pork tenderloin) you impact your ability to have something else (e.g., T-bone-like loin pork chops). If you've never butchered an animal before, I recommend familiarizing yourself with the different ways to break down a pig—even though you're going to have someone else do it for you. This video from Whitefeather Meats is very instructional; I especially like how they make different choices on each of the two sides of pork to show you what is possible.

Your farmer or butcher will complete a cutting sheet to document your instructions. This is the cutting sheet I completed (pork is just the bottom third of the sheet). When you order your hog, ask where it will be butchered and then you can research their cutting sheet in advance. Here are the cutting instructions we provided for our hog.
  • 5 lb roasts (we like them large for smoking)
  • Chops 1.5" thick, 2 per package (since there are two of us)
  • Hams: smoked, in half portions 
  • Bacon: Smoked, half sliced regular, half sliced thin
  • Spare Ribs: yes
  • Country Ribs: yes
  • Pork Butts: Roasts, keep whole
  • Pork Hocks: Yes
  • Pork Fat: Yes, and I requested that the leaf lard and back fat be separated.
  • Neck Bones: Yes
  • Pork Liver: Yes
  • Trimmings as ground pork
  • Special Instructions: Save the jowls and the head. I couldn't get the trotters because of the way they butchered it and the timing of my instructions. It pays to get your instructions in early!
You can change this up any way you like to get you the most of what you love. In the past I've had them cut out the tenderloin, resulting in smaller pork chops. We've also had them make bacon out of just one belly and give the other to us whole. I've forgone pork chops all together and had the butcher cut a bone-in loin roast (but they didn't remove the chine bone and carving it was difficult). I've skipped all the ribs and just added that to the ground sausage. I've ordered brats instead of ground pork. I've also historically ordered my hams "fresh" which means they're just like any other pork roast you'll receive and can be used for pulled pork-type recipes. This time I finally wanted to get some smoked hams so I have something too cook at the holidays that seems more traditional.

I use the pork fat to render lard (it could also be used in homemade sausage making), the neck bones and head for pork stock, and the liver for... I'm not sure yet. Perhaps this year I'll make a pate. In the past we had it made into liver sausage which we honestly didn't love and ended up feeding to our cats. At least it was used. 

I know for some people pork is all about sausage, so you may forego some of the roasts to get more of it. I personally love plain ground pork (especially in kimchi fried rice), so I take it plain.

Picking Up Your Pork

Your farmer will explain the pickup process to you; in my experience it happens one of three ways.
  • Pick up directly from the butcher, paying them the butcher fees directly and paying the farm the pork fees separately.
  • Pick up at the farm, paying all fees at once (if they have lots of freezer space)
  • Home delivery, paying all fees at once.
Our first three hogs were picked up at the butcher. We'd mail the farm our check for the pork, and pay the butcher the processing fees. If you have to go pick up your animal, bring containers—ideally, coolers. It may help to wear gloves, since you'll be transferring frozen packages from a butcher cart directly into the back of your car. You'll go into the shop, tell them you're picking up an order, provide your name and the farm's name, and they'll wheel the product out from the back for you. They may have a back loading entrance where you can do this without disturbing retail customers. When you finish you'll want to drive straight home and get your product into the freezer.

We lucked out, and the farm we ordered from this year prefers to do home delivery. They tell me that normally they'll even walk the product into your basement and put it directly in the freezer, but since we're in the middle of a pandemic they're doing largely contactless drop off on the porch. This morning our farmer drove up around 8:30 a.m. and dropped 3 medium-size boxes on my porch, grabbed the check I left for him, chatted briefly through the screen window and wished me a good day.

What We Got From Our Whole Hog

My husband tells me I'm a little overboard with my bulk meat record keeping, but I like to say I'm just thorough. Every time we purchase meat in bulk, I inventory, weigh, and label every package (most packages don't have the weight listed on the outside for private orders like this). This helps me keep track of what's in the freezer (since much of it is buried at the bottom of our chest freezer) and calculate our average cost per pound of package meat.
chest freezer filled to the brim with butcher paper-wrapped packages of meat


From this processor, each cut came wrapped in butcher paper and affixed with a detailed label. I've worked with other processors that just stamp the name of the cut on the butcher paper, and others who deliver everything in a double layer of clear shrink wrap.

Grocery Store Cuts

  • 11 packages of bacon, 1-1.25 lbs each
  • 2 pork butts, 8 lbs and 9 lbs
  • 20 bone-in pork chops, about 1 lb each (yes, they're huge)
  • 2 packages of country style ribs, about 2 lbs each
  • 2 packages of spare ribs, 2-3 lbs each
  • 13 packages of ground pork, about 1 lb each
  • 4 smoked hams, 7.5-9.5 lbs each
  • 2 loin roasts, 4.5 - 5 lbs each
  • 2 shoulder roasts, ~5 lbs each
  • 3 packages of hocks, 2-3 lbs each
  • Jowls, 2 lbs
Although some of these may be considered specialty cuts (e.g., jowls, hocks), they're what I consider "grocery store" cuts. You could likely walk up to the meat counter in most grocery stores, or in any butcher shop and get any of these cuts. If you preferred your roasts smaller, you'd obviously get more roasts than we did. We got less bacon than I expected; maybe our piggy had a smaller-than-average belly.

We received 137.5 pounds of grocery store cuts.

"Extras"

I told you I like to cook with the whole hog! In addition to grocery store cuts, we also received the following items.
  • Fat - 17.75 lbs
  • Leaf Lard - 6.5 lbs
  • Neck Bones - 3.25 lbs
  • Liver - 3.75 lbs
  • Head (in 2 halves) - 7 lbs
We received 36.8 pounds of "extras" from the hog, which surprisingly brought us all the way back up to our hanging weight.

Whole Hog Cost Comparison

Dividing the total cost by what we received in grocery store cuts, we paid $6.57 per pound for our pork this year. That probably seems like a lot if you're used to buying conventional pork (otherwise known as commodity pork), which retails on average around $3.75 per pound. That's what you'll see in the grocery store by default. Pastured pork, however, costs more. It's what you'll often see at specialty shops like The Conscious Carnivore. The August 2020 USDA Monthly Pasture Raised Pork Report provides the retail cost per pound for most of the cuts I received (or the closest equivalent). I've calculated the savings per pound on each of these items.
  • Bacon: $11.12
    • Savings: 41%
  • Butt Roast: $8.22
    • Savings: 20%
  • Pork Chops (sirloin chops): $9.70
    • Saving: 32%
  • Country Style Ribs (back ribs): $8.66
    • Savings: 24%
  • Spare Ribs: $7.04
    • Savings: 24%
  • Ground Pork: $7.59
    • Savings: 13%
  • Ham: $7.74
    • Savings: 15%
  • Loin Roast: $10.22
    • Savings: 36%
  • Shoulder Roast: $8.30
    • Savings: 21%
  • Hocks: $5.40
    • Savings: -22%
  • Jowls: N/A (apparently these aren't as common as I thought)
Every cut retails for well above the average price per pound we paid (except the hocks, which I only have the wholesale price for). Additionally, according to the USDA the wholesale price of the lard is $8.76/lb and the liver is $5.13/lb.

The total retail price of the grocery store cuts I received is $1,149.09. We paid $903.96, for a total savings of $245.13 (21%). 

I actually use the "extras," so we should also consider that the fat and liver retail at $224.61, although I wouldn't be purchasing them if I didn't already have the hog. All told, we received $1,373.70 in pork products.

Conclusion

I hope this demystifies the whole hog buying process for you. We've been very happy with our bulk meat purchases, and will continue to purchase meat this way. In fact, along with this hog the farmer also delivered us 10 whole chickens (that's 73 pounds of chicken), and we've ordered a quarter cow for delivery in October. The pork and chicken, along with a few remaining frozen bits of stock, have completely filled our chest freezer, so the beef will go in the upright freezer in the garage. I will write about our beef buying process when that meat arrives.

If you have questions about purchasing bulk meat, or if your experience was different form mine, let me know in the comments.

Monday, August 24, 2020

Harvest Monday: August 24

I neglected the garden during the week, saving all my harvests for the weekend. But Friday - Sunday I brought in over 30 pounds of tomatoes, four pounds of beets, a handful of hot and sweet peppers, a large bunch of basil and a lone 8-ball zucchini (the squash beetles are having a field day in the garden).

Here's what the harvest looked like. Well, most of it. In between harvesting and washing and preparing and doing the dishes and making the kitchen messy and cleaning it again I forgot to photograph a few things.

Friday was a mixture of Juliet, Roma, and cherry tomatoes with some fatali and scotch bonnet peppers and some green peppers This particular sweet pepper variety is meant to be picked green, and therefore was the first to mature in the garden. I also have some red peppers and chocolate peppers that have been growing well, but just started to show some color this week.

basket of tomatoes and peppers

On Friday night I combined the freshly-harvested hot peppers with some I'd stored in the fridge and attempted to start my first lacto-fermented hot sauce. I'll report back in a few weeks how that went. Prior to putting them in the food processor, weren't these peppers gorgeous?

bright yellow textured peppers

Saturday was all about the tomatoes. I brought in 25 pounds—6 pounds of Juliets and 19 pounds of Celebrity and Roma. The few green Celebrity tomatoes had fallen from the branches. They don't even have a hint of orange to them so I'll probably do some sort of green tomato preparation.

four large bowls overflowing with tomatoes

While picking the tomatoes I spied this very large beet and decided to pick it before it became woody. It's the first full-size harvest of my Lutz Winter Keeper variety.

red beet the size of the hand that's holding it


On Sunday I pulled my golden beets, as they'd started to get heavily attacked by some sort of bug. Because of that, the greens were a loss and went into the compost pile. Once trimmed, they weighed in at 3 pounds, 10 ounces. I also harvested a large bunch of basil, which I forgot to photograph. 

basket of golden beets

I had to drag the sprinkler out to the garden to water on Sunday, since we haven't had rain for over a week. This is the first time I've had to water the garden in over a month.

In terms of using the harvest, it was tomato palooza on Saturday. I made a 1.5x batch of Annie's salsa (10 pints canned + 1 quart for the fridge), dehydrated 9 pounds of Juliets (yield: 1.5 quarts). 

10 pint jars filled with salsa

shiny small tomatoes sliced in half

dehydrated tomatoes on a tray

I also roasted a large pan of tomatoes. The roasted tomatoes were blended into sauce, which I combined with a too-thick roasted sauce from the fridge I'd made earlier in the week that also included carrots, zucchini, and onions. The resulting mixture was still too thick, so I pulled one of my "failed" jars of crushed tomatoes from a few years back out of the pantry. I'd ended up canning mostly tomato water with a little pulp on the bottom. Opening the jar, it still smelled distinctly like tomato, so adding that to the sauce served thinned it without diluting the flavor. I ended up with just over a gallon of sauce, which is frozen flat in Ziploc bags in 2-cup servings. 

Last, but not least, I roasted up the beets. We'll eat plenty fresh this week, but if I have extra after a few days I'll dice and freeze for use in grain salads this winter.

Every Monday gardeners around the world share their harvest. View all of this week's Harvest Monday posts, hosted over at Happy Acres.

Monday, August 17, 2020

Harvest Monday: August 17

This week was all about tomatoes. I brought in three harvests, on Tuesday, Saturday, and Sunday, and they were mostly tomatoes with a few peppers and zucchini thrown in. There are some beets ready to harvest but I'm letting them sit for a bit.

Here's what I harvested from the garden this week.

harvest basket full with tomatoes on the bottom, a zucchini in the corner, and topped with bright yellow peppers

harvest basket almost completely full of tomatoes, with two green peppers and some small yellow peppers on top

Harvest basket about two thirds full of tomatoes, with one zucchini

With all of these beautiful tomatoes, they were the stars of our meals this week. We had BZT's on Monday (with no lettuce, we replaced it with a grilled zucchini slice and it was pretty good), panzanella salad on Tuesday, and more BLTs starting on Thursday when we got some more lettuce.

panzanella salad with red and yellow tomatoes

The panzanella salad is tossed with olive oil and then drizzled with a balsamic reduction. I used red tomatoes from the CSA and the yellow tomatoes are Mr. Stripey from the prior week's harvest.

closeup of the inside of a BLT

Over the weekend I started to process the tomatoes. 5.5 pounds of Juliet tomatoes went into the dehydrator. This is the first time I dried them as halves rather than slices, per Dave's advice. They took a little longer than I expected (about 26 hours), but they were worth the wait. Not only are they absolutely delicious (my husband says they taste like tomato fruit rollups), but because I dried them skin side down, the dehydrator trays are still clean! Cleaning up trays after dehydrating sliced tomatoes can be a pain. You've converted me, Dave. Will do another batch later this week.

halved tomatoes on a dehydrator tray

quart jar of dehydrated tomatoes

Another 7 pounds of Celebrity and Mr. Stripey went into some salsa for canning. I use a tested recipe from Annie, a contributor on the Houzz (formerly GardenWeb) Harvest forum. Annie's salsa is our favorite, and I'll try to make at least two more batches this summer. The Celebrity tomatoes were perfect for this recipe, with their fleshy consistency. They were also extremely easy to peel and deseed. I got seven pints for canning, and about 3/4 cup leftover that I used on a smothered burrito for brunch on Sunday.

Glass jars of salsa

If you'd like to see what other gardeners around the world are doing with their harvest, head on over to Happy Acres, where Dave hosts Harvest Monday every week.

Monday, August 3, 2020

Harvest Monday: August Is Here

I had four separate harvests from the garden this week, and plant diversity is increasing. That means August is here! I had the week off of work, so I was able to spend a lot of time in the garden, thinking about the garden, and planning for some big changes for next year's garden (more to come on that in a separate post).

Tuesday, when I posted my July garden journal, I picked a handful of tomatoes and peppers, but forgot to photograph them. I did remember to take photos of the garden though. The first photo has my winter squash on the left, 8-ball zucchini and fennel poking up behind them, and the mass of tomatoes in the back. The foreground is peppers and a row of Swiss chard.

Vegetable garden with a path in the middle

It didn't feel like 80 degrees in the shade; it was a lovely morning. Here you'll see my sparse rows of beans (1) and carrots (4). Behind those are the rutabagas. They look wilted because I'd just thinned them. Behind those you can barely see the rows of beets. So far I've only had to water the garden two or three times because we've been getting regular rain. The squash plants were thirsty by Friday afternoon, but with rain in the forecast on Sunday I held off (right now watering is a production of connecting and running a 50-foot hose). The rain came in multiple downpours, so the squash should be happier now.

vegetable garden

I remembered to photograph the remaining harvests. On Thursday I got more tomatoes (Juliets and some cherries), a green pepper, two 8-ball zucchinis, and some super chili ornamental peppers.

harvest in a basket

Saturday brought two harvests: the first ripe Celebrity tomato, and a mountain of beet thinnings (Lutz Winter Keeper and Golden) providing a glut of baby beets and beet greens, which I've yet to process.

tomato held in one hand

lots of beets

A quick spin through the garden on Sunday before the rain came found more tomatoes, including the first few Romas, another pepper, more chiles, and some jalapenos (Mighty Nacho).

white bowl of vegetables

Although I sliced a few for a pizza, most of the Juliets have been roasted and eaten with eggs for breakfast. When I start getting them in larger quantities I'll dehydrate them. The cherry tomatoes and peppers are combined with CSA veggies for mason jar salads that Aaron has been taking to work. While trying to get feedback on what salads he liked best, I learned it doesn't matter what veggies are in it as long as there's some smoked pork. So he smoked another pork roast this weekend so he'd have salads for this week.

glass pan of roasted tomatoes

mason jar salad with chickpeas

mason jar salad with black beans and pork


mason jar salad with cucumbers, tomatoes, and pork with dressing in the bottom


Some of the jalapenos I harvested Sunday went into a jalapeno corn bread that we had with the pulled pork and some CSA corn on the cob. It will make a good side for Aaron's Southwest salads this week, too.

cornbread in a round cast iron skillet, with 1/4 sliced out

That's all from Gross Farms this week. I hope you'll head over to Happy Acres to see what Dave and the other Harvest Monday participants are pulling out of their gardens and cooking.

Hopefully in a few days I can get a post together about the BIG garden plans for 2021.

Tuesday, July 28, 2020

Garden Journal: July 2020

I've always had good intentions of keeping a garden journal. I read memoirs like Animal, Vegetable, Miracle or Garden Wisdom: Lessons Learned from 60 Years of Gardening and imagine the treasure trove of journals the authors must have drawn from. Any garden journal I've kept doesn't make it past a few entries. This blog is the closest thing I have to a journal. I need to stop imagining a journal as a physical book that I write in every day or every week. The concept of journaling is to create time to reflect and remember events in the future. My blog, camera roll, Instagram and Facebook accounts, and garden planning software serve that function in aggregate. I've given myself permission to be a good gardener without a garden journal.

Today was different. I have the week off from work, and my intention is to spend most of my time in the garden, the kitchen, or with my nose in a book. This morning, after a cup of tea and a peach scone baked from scratch, I brought my second cup of tea out to the garden and unfolded a camping chair. I just sat and looked at things. When the carrots or rutabagas were just screaming to be thinned, I obliged. I pulled a few weeds. I propped up a leaning pepper plant and harvested a few ripe tomatoes. I kept noticing things I wanted to remind myself of next year, now that I'm 8 weeks into the first season of gardening in an open canvas of dirt, rather than raised beds or designated planting holes through fabric as I have for the last decade. I came up with quite the list, from the practical to the philosophical. I'm documenting it here for future reference, and for any unintended benefit to aspiring or current gardeners who stumble upon this post.

The Garden As A Living Space

A garden is a place to relax (or work hard) and enjoy my home. Space left open for paths or to give veggies room isn’t wasted; it’s prioritizing the garden as living space. For years I tried to maximize my yield per square foot, sometimes planting raised beds in the square foot gardening method. I only planted corn once (it was a failure due to strong storms, animals, and general neglect) because I couldn't justify just two delicious ears of corn per stalk. What was I thinking, that's the perfect amount for dinner! Prioritizing for yield may mean minimizing enjoyment. My garden is not intended to be a second job.

The shade tent is amazing for working on hot, sunny days, but it’s cumbersome for one short person to move around, especially because the legs dig into the ground. Perhaps we could put some tennis balls or something on the bottom of the legs to make it easier to drag?

Spacing: Never Trust An Ambitious Gardener


  • 18”-24” spacing for peppers is perfect. Consider adding a support pole right away, and tying plants to poles about 6 weeks post transplant. Don’t wait for them to fall over. Treat them nicely. 
  • GIVE THE DETERMINANT TOMATOES MORE SPACE. 18” apart is not enough. It creates a tangled mess, increases chances I miss ripe tomatoes, and makes harvesting more unpleasant since my skin reacts poorly to tomato leaves. Plant them 2’-3’ apart next year. So far, yields are amazing. I may not need to plant 20 plants next year. TBD. 

  • Although the winter squash do just fine direct seeded in a hill, I need to commit to removing seedlings so I have the quantity I planned for. This year I didn't do that, and I'm curious to see if it will yield to overall smaller squash. They do really well in my garden both up free-standing trellises and on the ground. If I continue letting them spread on the ground, I should mulch heavily with cardboard and straw or grass right after planting so I don’t have to worry about that area for the rest of the season (other than the hills).

Spring Reminders


  • Never put off mulching. Mulching makes everything grow better, makes maintenance easier, and it’s pretty! When planting rows of direct-seeded vegetables, consider mulching first, and leaving space where the rows will be. That should motivate me to still plant on time but the mulching will be done!
  • I’ll probably never regret under planting seeds (more room to grow, larger/healthier plants) but I will regret over planting them because of the extra work of thinning, less room for air to move when harvesting, etc.
  • It’s a good idea to seed radishes in with carrots, but do so sparingly (no more than 1 per foot) and only with the quickest growing varieties. This makes more sense to me than planting a dedicated row of radishes, because they’re not my favorite vegetable. 
  • It’s probably worth the tedium to create carrot seed strips or mats for planting, and always best to use seed that’s 1-2 years old. Old carrot seed doesn’t seem to fade as well as other varieties. Old beet, rutabaga, and chard seed does just fine though. 
  • Begin watching indeterminant tomatoes to prune suckers immediately. If I let one go so long it becomes a stem with blossoms on it, I won’t have the heart to prune it and I’ll regret it by July or August. Commit to tying the tomatoes to their stakes once a week whether I think they need it or not. If I continue to grow cherry tomatoes up rebar, I need to plant more (assuming I’m limiting them to a single vine). As my garden expands, I may want to consider planting them in some sort of container where 3-4 vines would be allowed to develop and drape over the sides.
  • Chard works just fine direct seeded in my garden. Kale is more challenging that way and should probably be transplanted.
  • The 8-ball zucchini grows straight up and puts out climbing vines. While it’s doing fine in hills, it would probably do well in a row in front of a trellis. 
  • Direct seeding basil was a bust (possibly because of old seed but I suspect because of inconsistent moisture). Definitely start these indoors for transplant.


Early Summer Reminders


  • Thin beet greens at 4 weeks for greens only, 6-8 weeks for baby beets (but the latter is probably slowing down growth of the main crop). Remember- they put out more than one seedling per seed by nature. It’s ok to space them generously when planting.
  • If critters eat my beans plants, replant promptly. They’ll catch up quickly (missed opportunity in 2020).

If anyone else is reading this, what has your garden taught you so far this year? What mistake do you seem to keep making year after year?

Monday, July 27, 2020

Harvest Monday: First Tomatoes of 2020

The garden is looking lovely, although honestly I feel like I've been neglecting it since I'm only out there a couple of times per week. My plant selections anticipated that behavior, so I think it should be ok. On Monday (no photo) we harvested our first full-size green sweet pepper, some basil and a single Sungold tomato, which tasted like heaven.

On Sunday night I stepped into the garden before a strong rainstorm and harvested two 8-ball zucchini (which went with a third we'd harvested on Monday), three more green sweet peppers, a bright red Yum Yum pepper, and a few unexpected handfulls of Juliet tomatoes, along with more Sungolds and the first Sweet 100s. Getting tomatoes before the end of July here is a real treat. I'm sure I'll be drowning in tomatoes before long (I have 20 paste tomato plants, two cherries, and two slicers).

Two of the peppers and all three of the zucchini were immediately used for dinner. I stuffed the zucchini with a mixture of onions, peppers, cooked radish and kohlrabi greens, black beans, brown rice, Penzey's fajita seasoning and shredded cheese. We have lots of leftovers; each of us ate about half of one and an ear of sweetcorn from our CSA.

basket of vegetables on a countertop


round zucchini stuffed with bean and rice mixture

I'm also getting a CSA this year, so that's where a lot of our veggies come from. We've been rolling in the greens though, because in addition to the CSA I've been pulling radishes from the garden and trying to use their leaves, and I've thinned just one row of beets (I have 4 more to go) and used the greens in a variety of dishes. I tried my hand at fermenting radish greens for about a week and used them in fried rice. The beet greens mainly end up in egg dishes and pastas. The reason I had leftover cooked greens to put in our stuffed zucchini was because I cleaned and chopped all the radish and kohlrabi greens we had and put them on a pizza. Using a store-bought crust, I used basil pesto for sauce (I found the pesto—from 2014—buried in the freezer and it still tastes fine), then piled the pizza with greens, mozzarella cheese, more greens, and then curls of zucchini tossed in olive oil, salt, and pepper. Finished it off with some fresh basil from the garden. We'll definitely make this again. (I was inspired by this recipe.)

Pizza topped with curled zucchini and basil

I took some garden photos on July 5, before I'd finished most of my mulching. These are three weeks old now, but they'll help establish the layout of my barden.

In the foreground of the first photo (past the weeds) from right to left is: melons (Minnesota Midget and Banana), beets (pre-thinning), rhutabaga (pre-thinning), and some irregularly seeded rows of carrots with radish markers.

On the opposite side of the black path on the right are my determinant tomatoes (20 plants), and on the left is my pepper patch (both sweet and hot), and some fledgling kale and sweet chard seedlings (that are doing much better now).

vegetable garden


From another point of view, you can see the four determinant tomatoes climbing up rebar, with the rhubarb plant behind them. To the right of the tomatoes is a small basil patch, and moving right from there is fennel, celery, zucchini, and winter squash (Red Kuri and Waltham Butternut).

vegetable garden with house in background

This post is a part of Harvest Monday, hosted by Dave at Happy Acres. Head over to his post to see what gardeners around the world are harvesting.